Creating Appointments |
  
|
Scheduler allows for fast setup and effective management of client appointments in different locations.
To access, log into Manage and open the respective tab from the left-side navigation menu:

On the SCHEDULER screen, there is a set of filters that enable users to modify how their data is displayed:
-
View
-
Display
-
Location
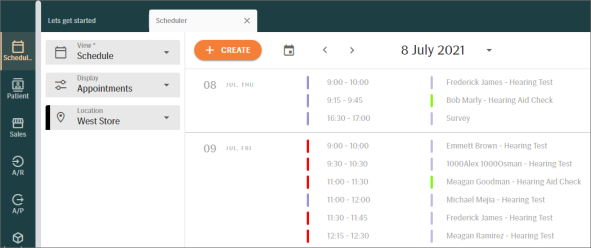
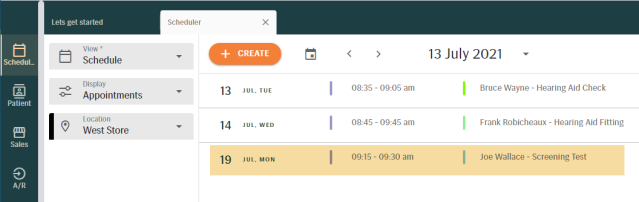
Below is an example of a schedule VIEW that DISPLAYS all appointments for the West Store LOCATION
NOTE: all filter selections are retained. So next time, you open a Scheduler tab or sign into Manage, the same pre-filtered view will be shown.
How to use filters
The VIEW filter :
-
Day - gives a day's view of the appointment calendar
-
Week - gives a week's view of the appointment calendar
-
Schedule - displays all appointments starting from a set date without any end date limitation (i.e., infinite view)
The DISPLAY filter:
-
Calendars - shows appointments for a specified location. A certain location must be selected before specialists can be added to filtering
-
Location - shows appointments for a specified specialist. First, a certain specialist must be selected and then their associated locations can be added to filtering
-
Appointments - shows a list of appointments for a specified location, without any additional refinement
Creating an appointment
There are 2 ways to create an appointment:
-
Using the CREATE button

-
From the Day/Week view grid (see below)
When opting to create an appointment from the Day/Week view grid, make sure your scheduler data is using the Day or Week filter for VIEW
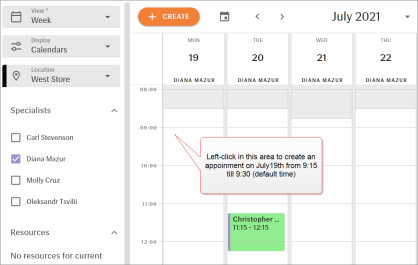
Each grid cell is invisibly divided into 4 parts with a 15-minute step. Click on any free spot, and the DATE, START and END TIME will be defined automatically.
-
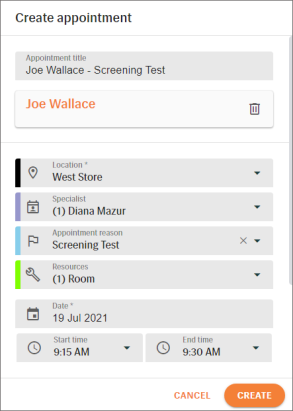
For convenience, appointment reason now has default duration (for example, Hearing Aid Check – 30 minutes, Free Screening – 15 minutes). However, its default length can be changed if you modify the END TIME.

Fill in all required fields. Default mandatory fields are:
- Location
- Date
- Start time
- End time
- Specialist or Resource
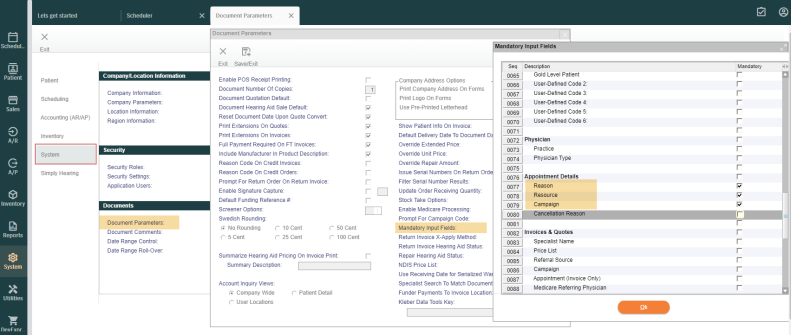
The following fields can also be made mandatory for appointment creation:
- Resource
- Appointment Reason
- Campaign
To configure additional mandatory fields, navigate to SYSTEM > CONFIGURE SYSTEM SETTINGS > DOCUMENT PARAMETERS > MANDATORY INPUT FIELDS.
Finding an appointment
After an appointment is created, it will be displayed in Scheduler. You can find it using the corresponding fitler set.
EXAMPLE 1: the new appointment shown in SCHEDULE view in the list of all appointments for the West Store location
EXAMPLE 2: the new appointment shown in WEEK view for the West Store location and Specialist Diana Mazur
